


Loại gói
Hạn sử dụng (Ngày)
Gói Data
Loại dịch vụ
Chỉ internet
Số lượng
1
Vietnam Local/Mobifone
International eSIM Installation & Activation Guide
To ensure seamless internet connectivity during your trip, please read the following installation instructions carefully. The process is quick and simple, but requires a stable Wi-Fi or Internet connection.
⚠️ IMPORTANT NOTES BEFORE INSTALLATION:
- Only install the eSIM when your device is connected to a stable Wi-Fi/Internet connection.
- DO NOT DELETE the eSIM once it has been successfully scanned. Each QR code can only be scanned once.
- We recommend installing the eSIM at home before departure (install only, do not enable mobile data) so you can access the internet immediately upon landing.
1. Installation Guide for iOS (iPhone)
Step 1: Install eSIM on your device
- Go to Settings > Cellular (or Mobile Data) > Tap Add eSIM (or Add Cellular Plan).
.jpeg)
- Select Use QR Code and scan the QR code received via email.
*If you cannot scan the QR code, select Enter Details Manually at the bottom of the screen and enter the SM-DP+ Address and Activation Code.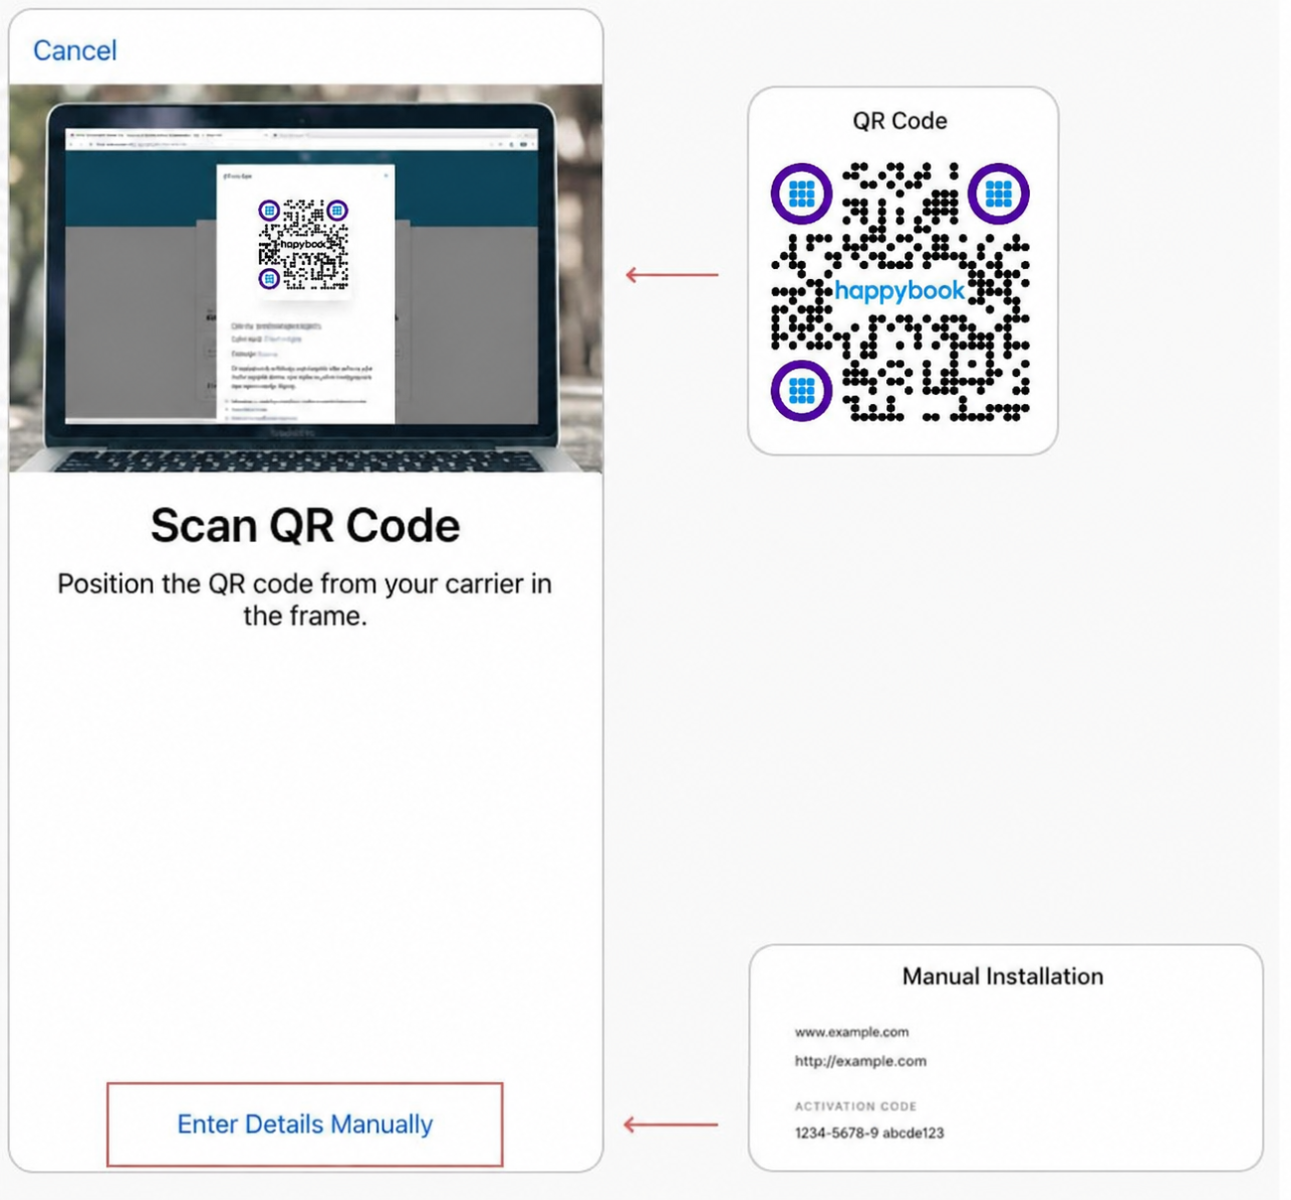
- Label the eSIM: Choose or customize a label for your new eSIM (e.g.,
HappyBook Travel - Thailand) to easily distinguish it.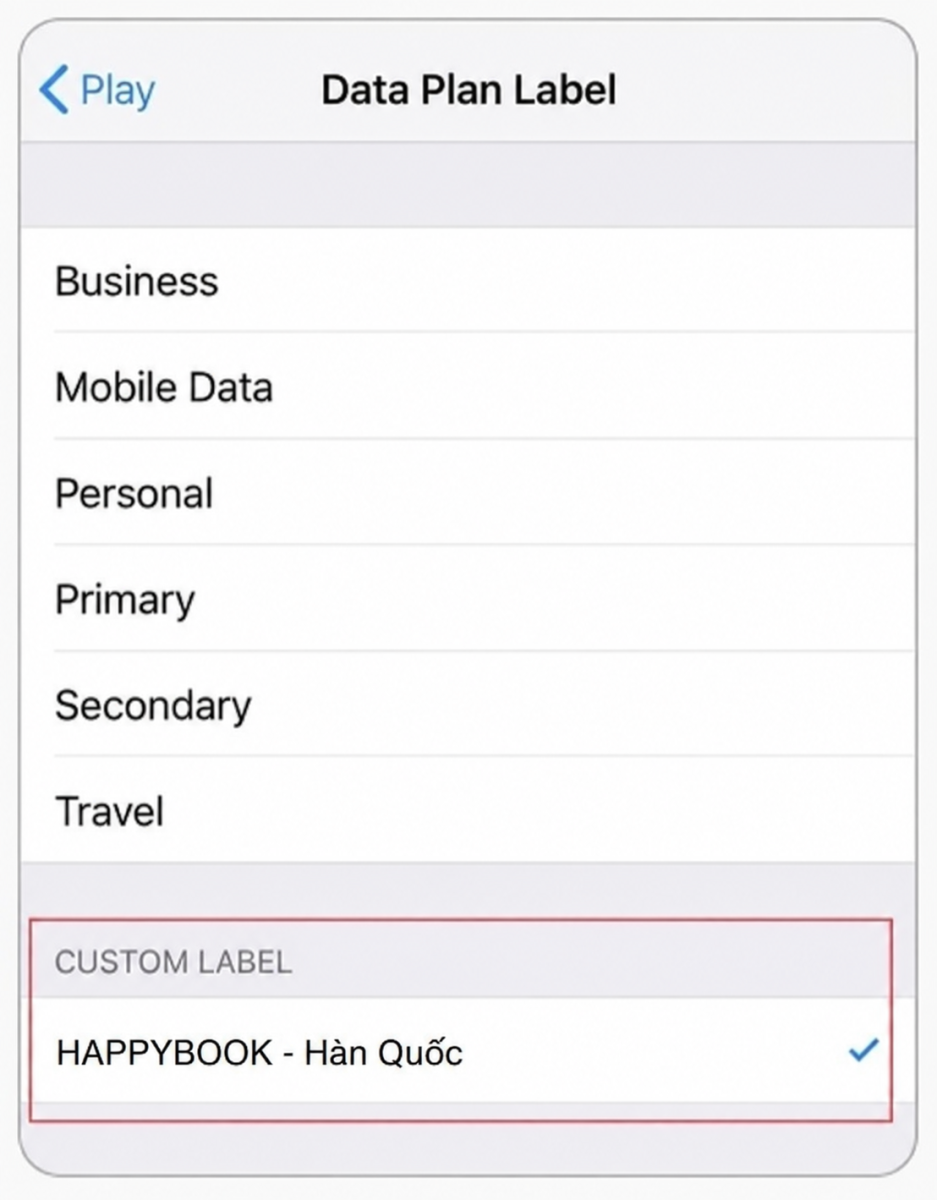
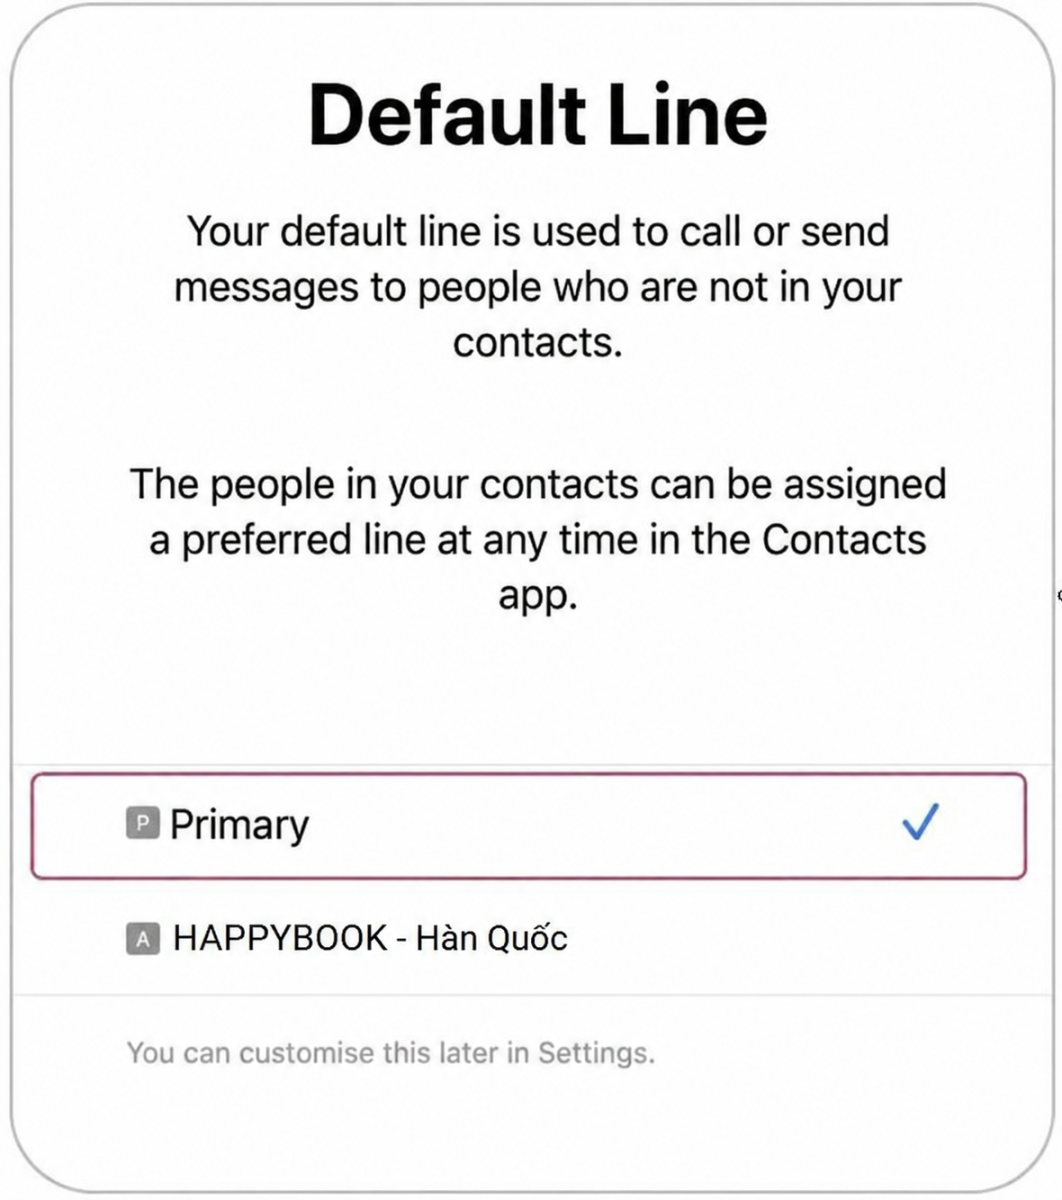
- Default Line: Select Primary to continue using your local SIM card for calls and text messages, then tap Continue.
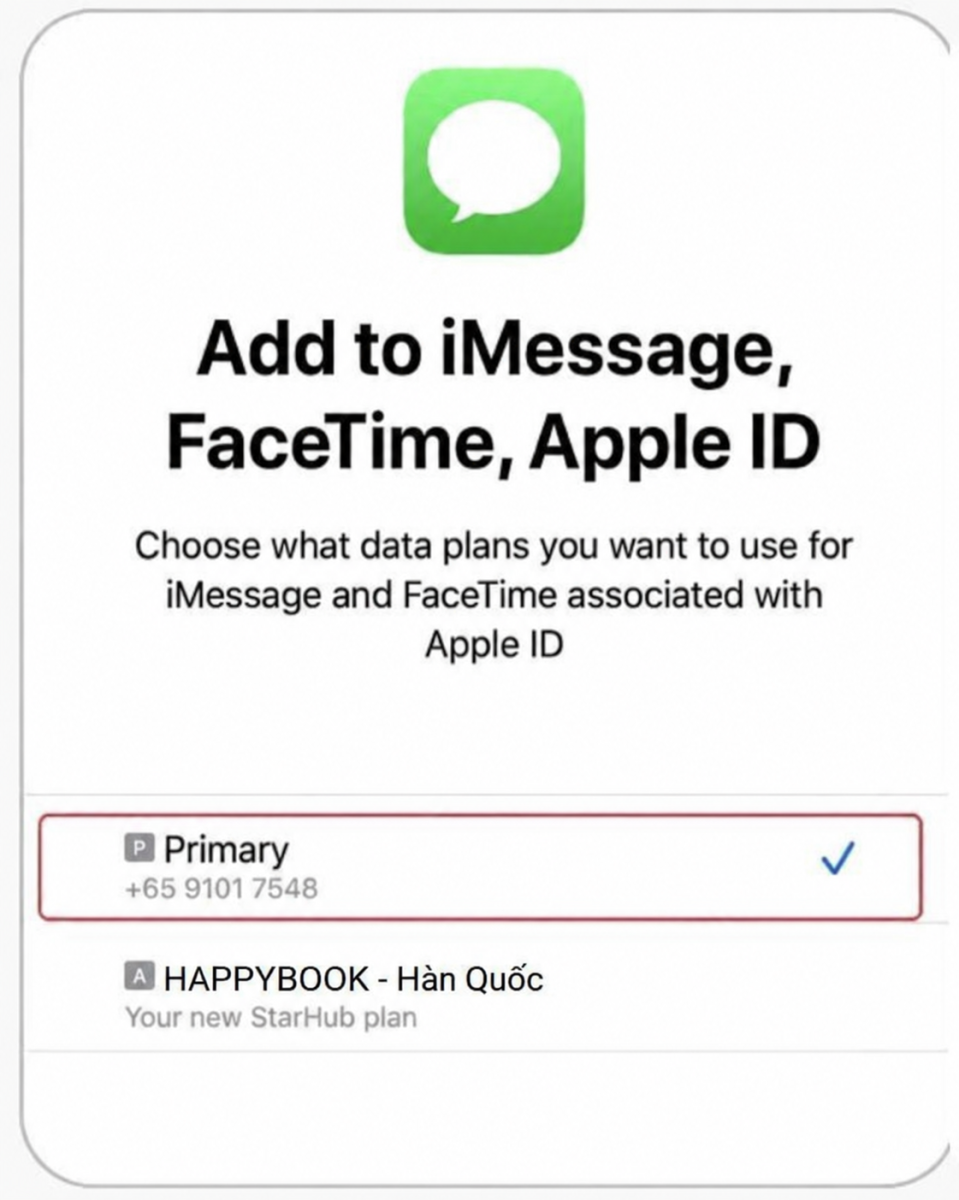
- iMessage & FaceTime: Select Primary and tap Continue.
- Cellular Data (Mobile Data): Select Primary if you are still in your home country (or select the travel eSIM if you are ready to board/arrive abroad).
⚠️ Make sure to TURN OFF the option Allow Mobile Data Switching to avoid unexpected international roaming charges on your primary local SIM.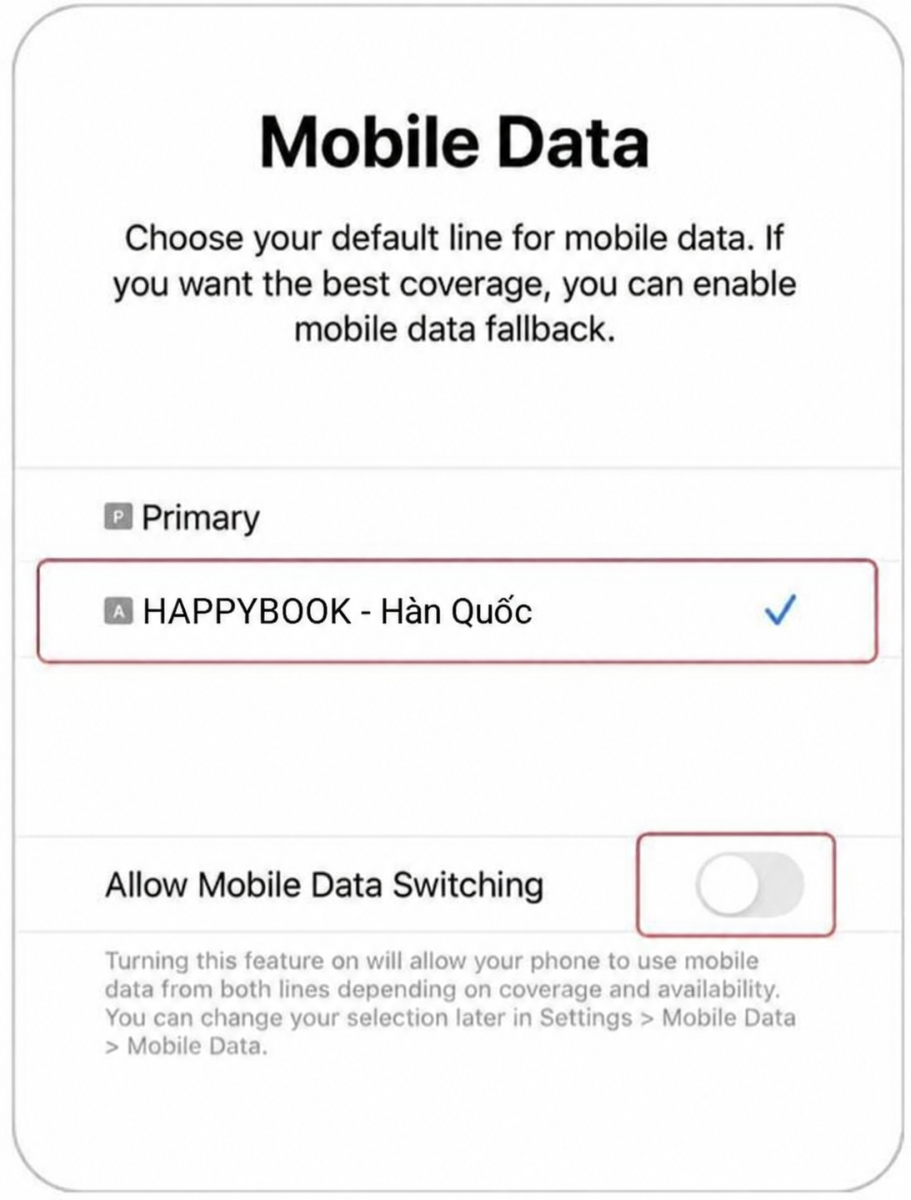
- Temporarily Turn Off eSIM: Go to the settings page of the newly installed eSIM and turn off Turn on this Line until you reach your destination.
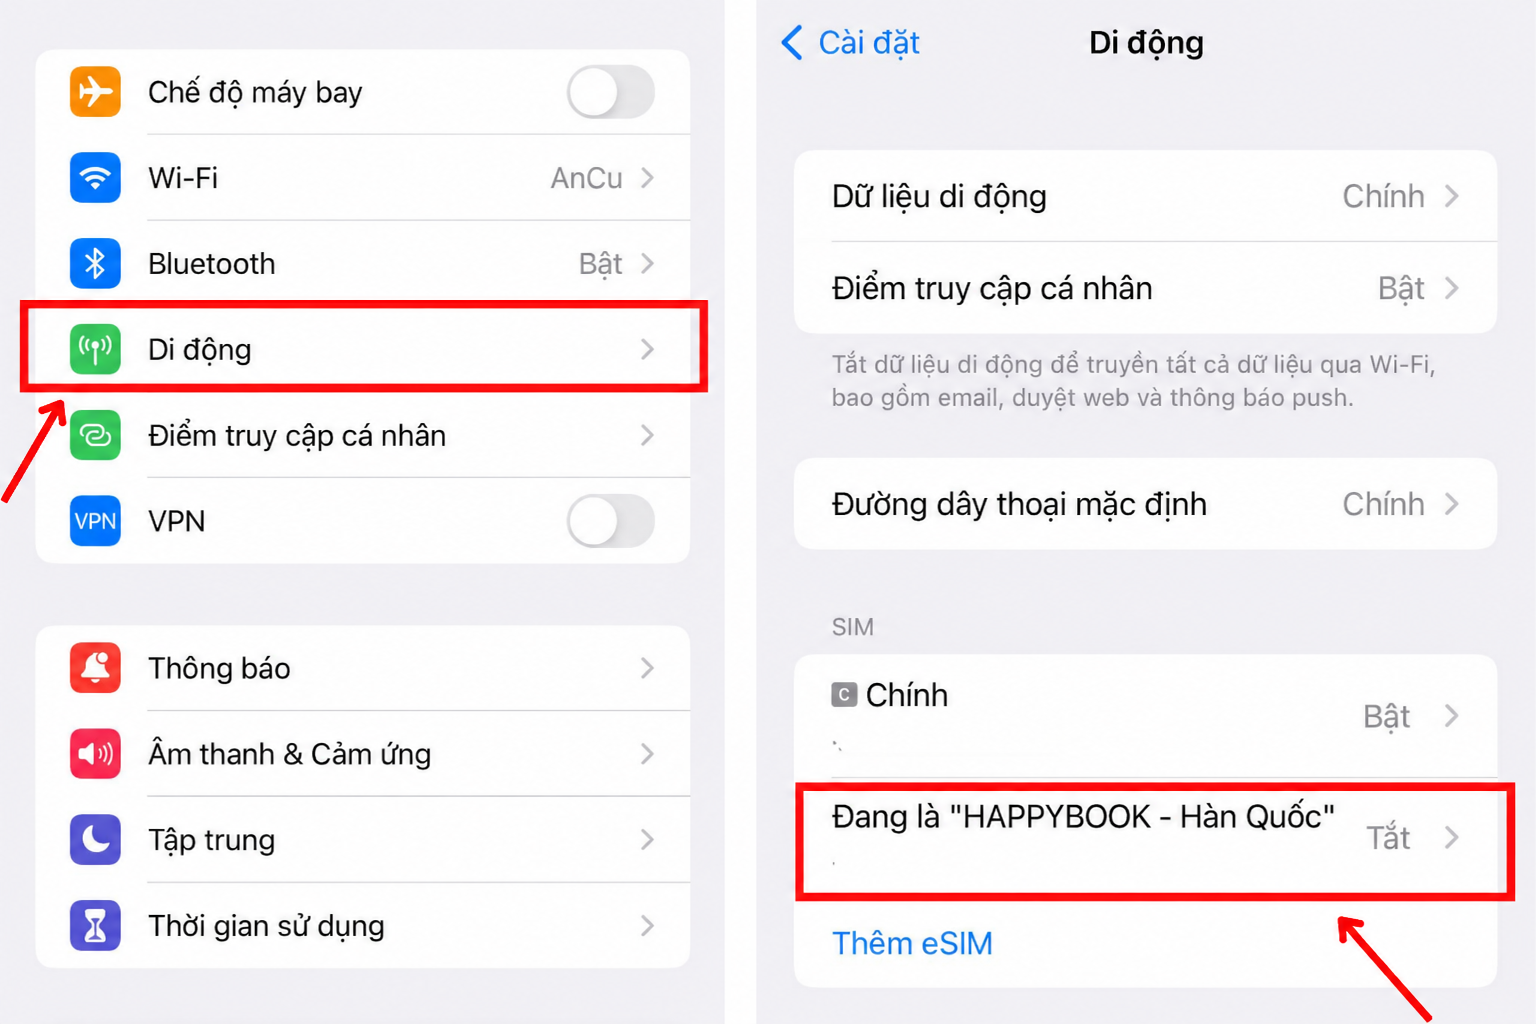
Step 2: Activate eSIM upon Arrival
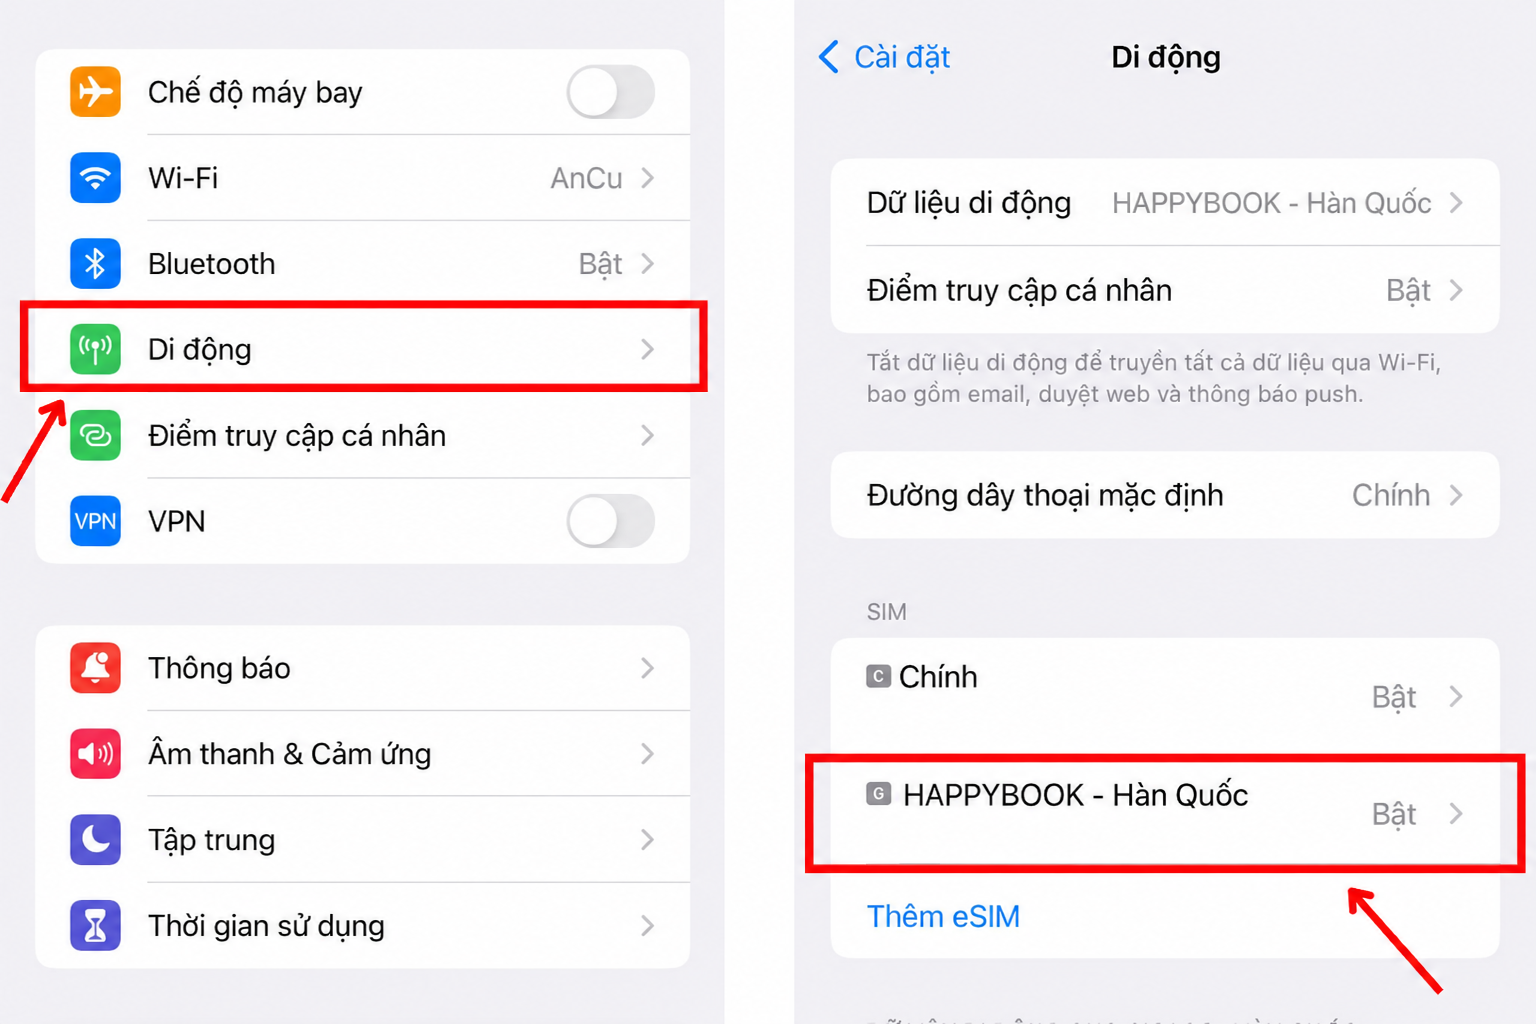
- Go to Settings > Cellular (or Mobile Data) > Select the travel eSIM.
- Turn on Turn on this Line.
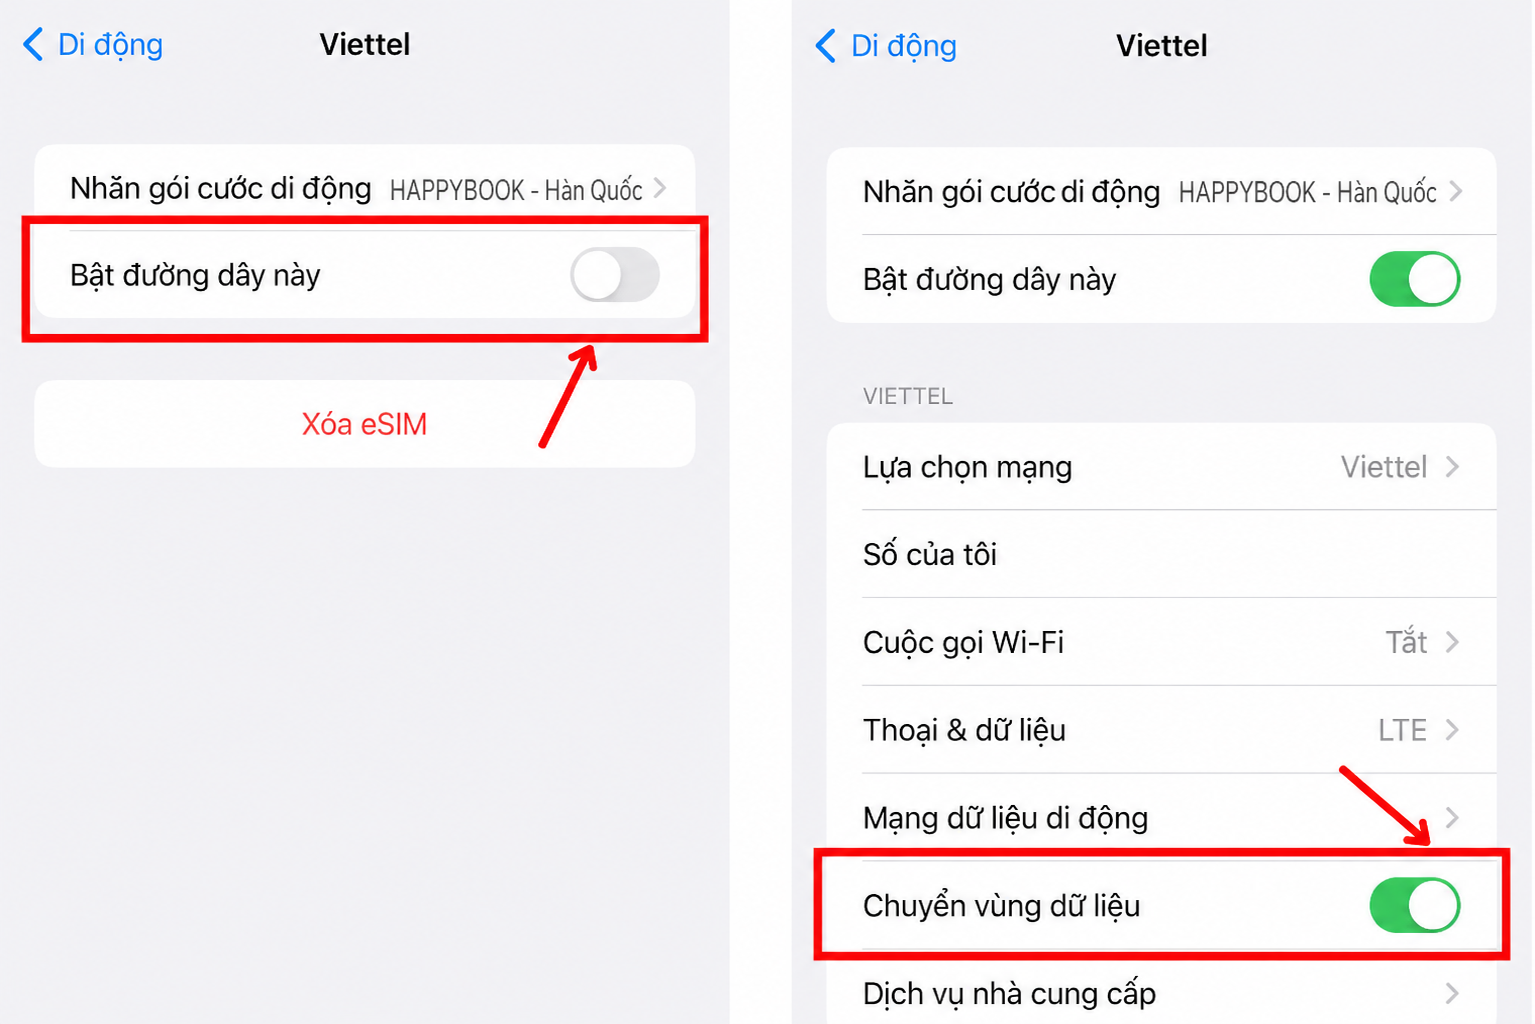
- Turn on Data Roaming for this eSIM.
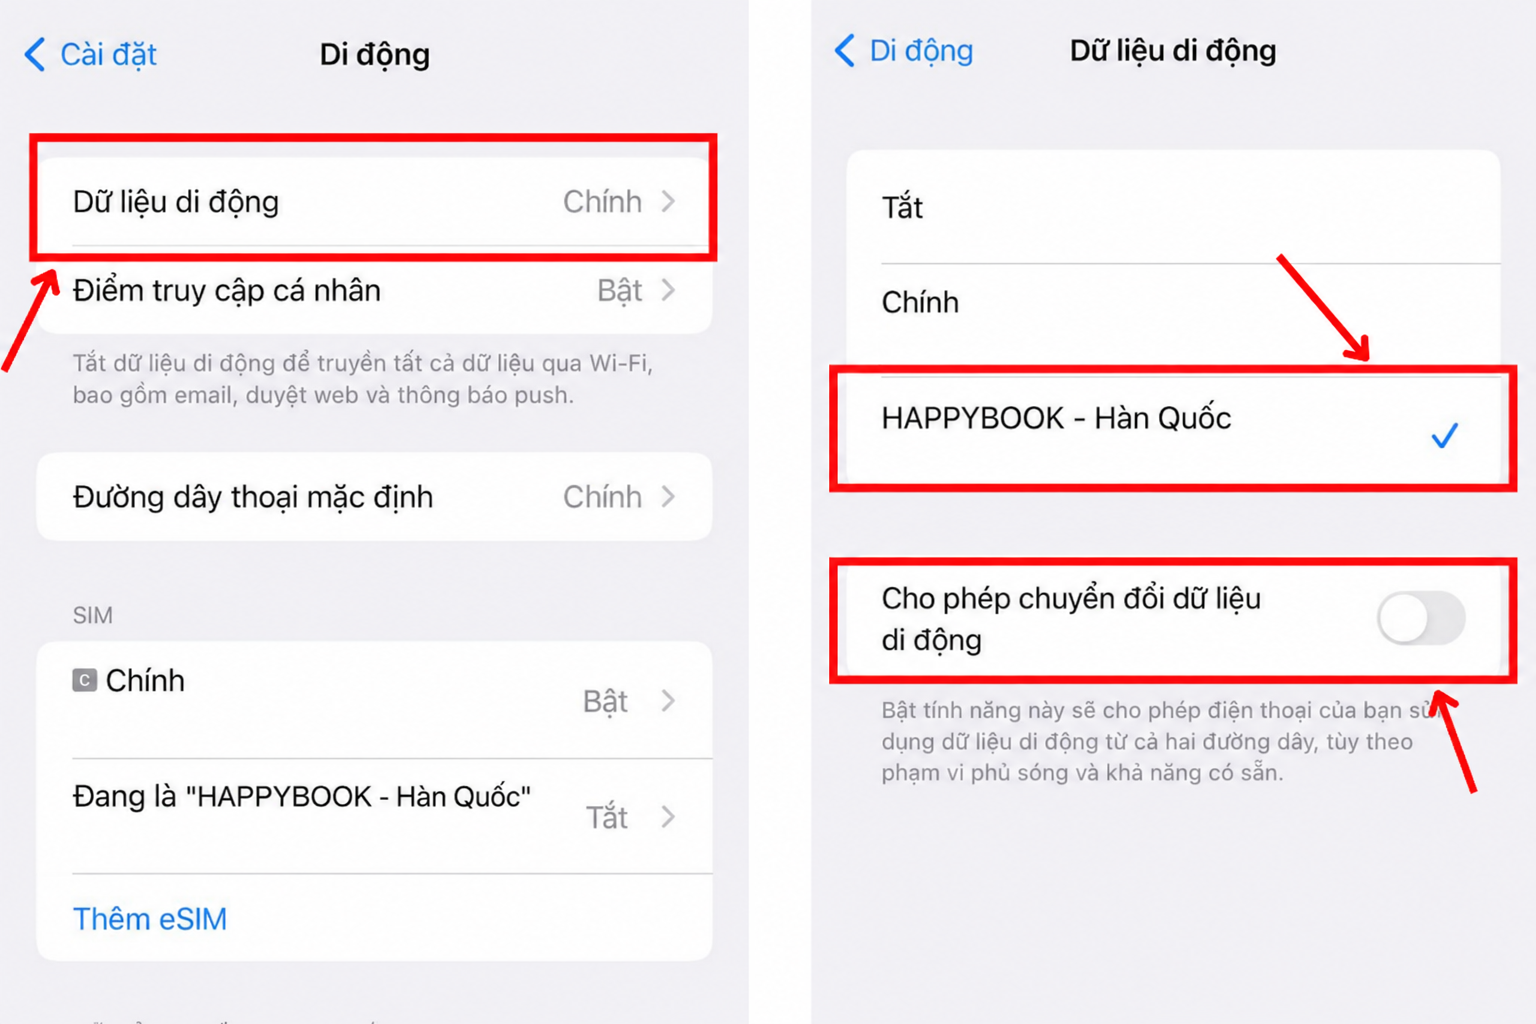
- Set the travel eSIM as the default line for Cellular Data (Mobile Data) and TURN OFF the option Allow Data Switching.
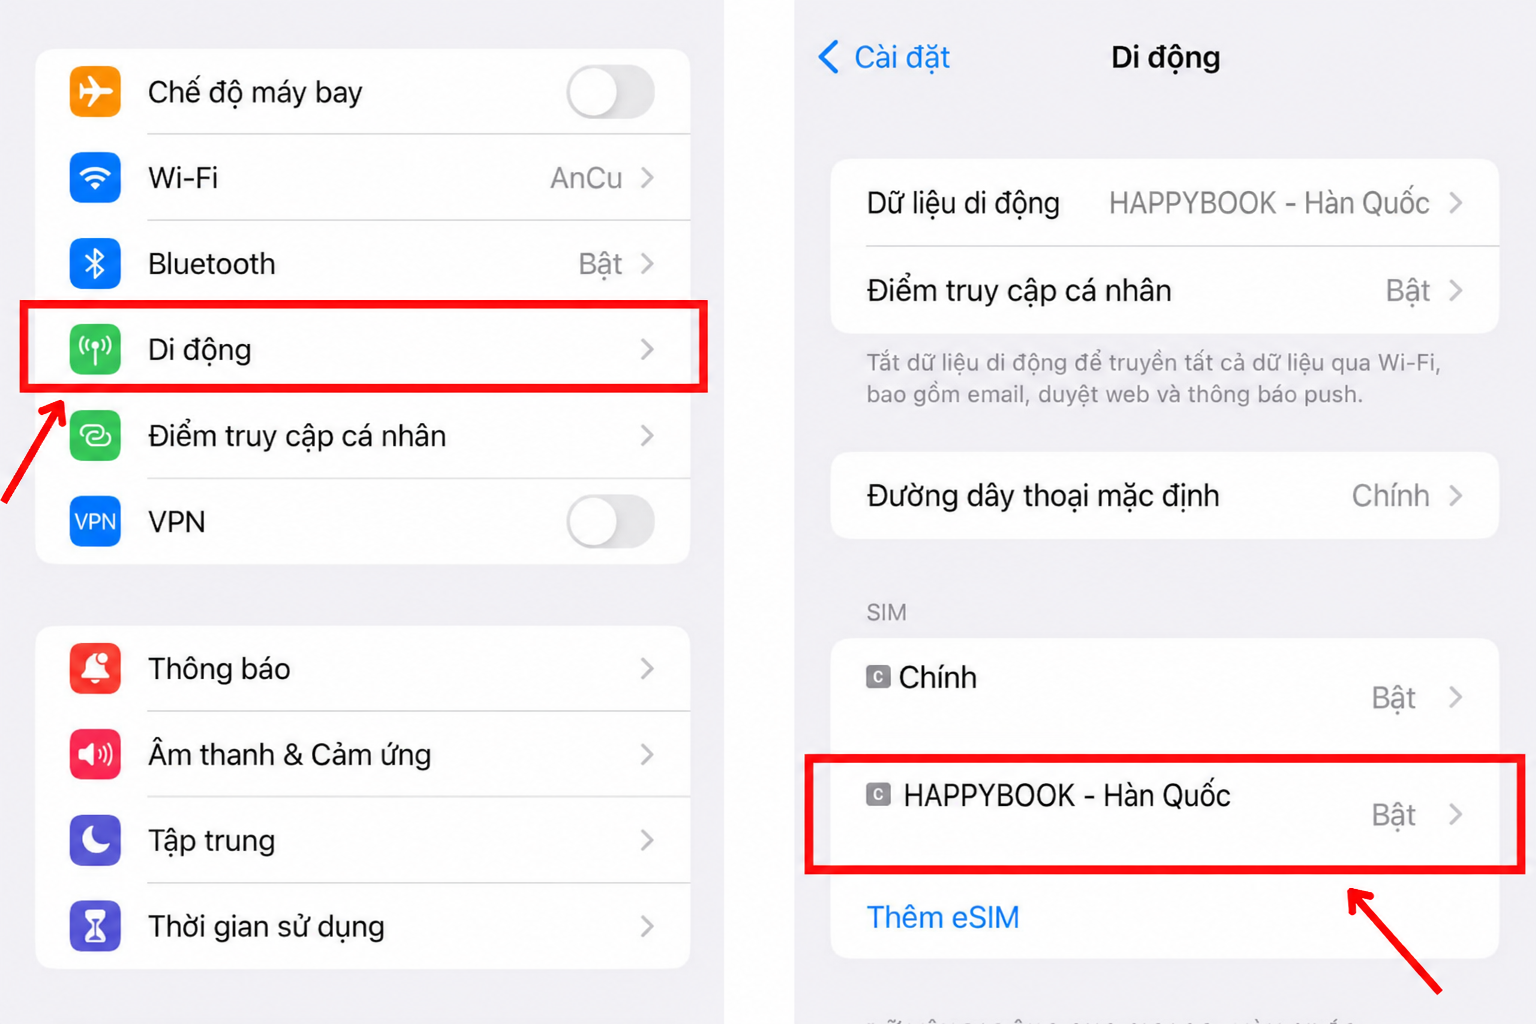
💡 APN Configuration (Only if you cannot access the internet)
If you have enabled the eSIM and Data Roaming but still cannot access the internet, please configure the APN settings manually:
- Go to Cellular (Mobile Data) > Select the travel eSIM.
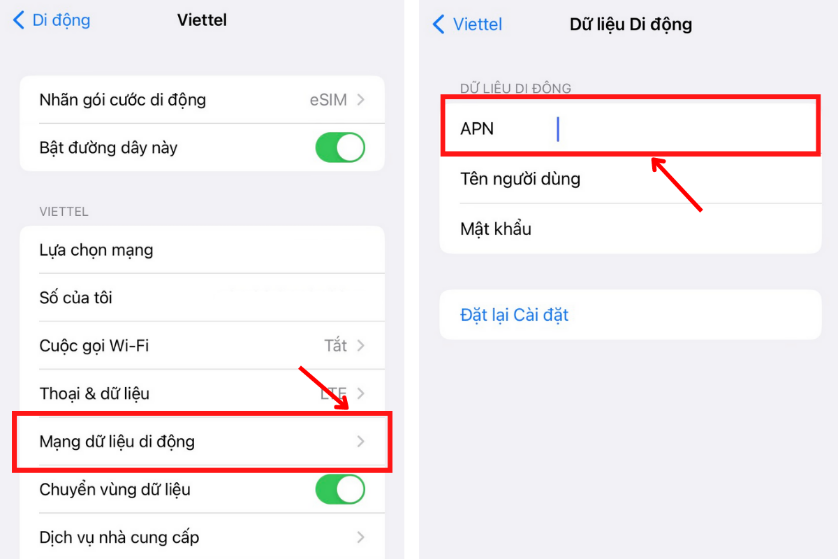
- Select Cellular Data Network.
- Enter the APN name (provided in the order confirmation email) in the APN field (leave other fields blank).
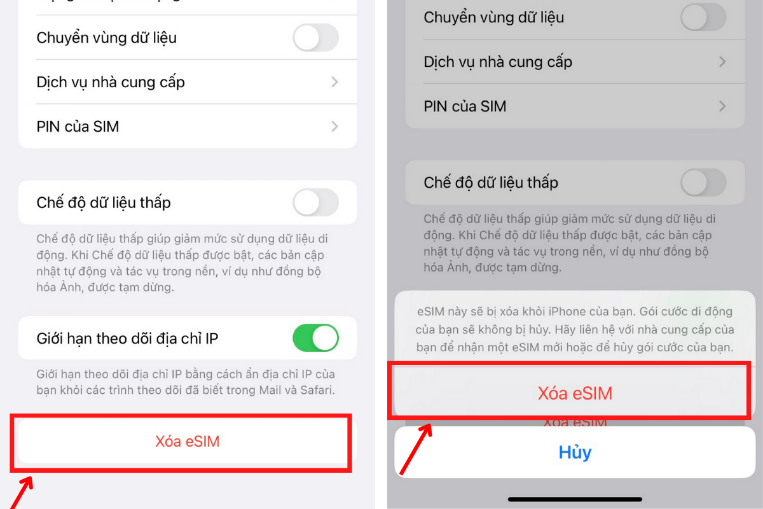
Step 3: Delete eSIM after your trip
Once your trip is over and you have returned home, go to Settings > Cellular > Select the travel eSIM > Scroll down to the bottom and select Delete eSIM.
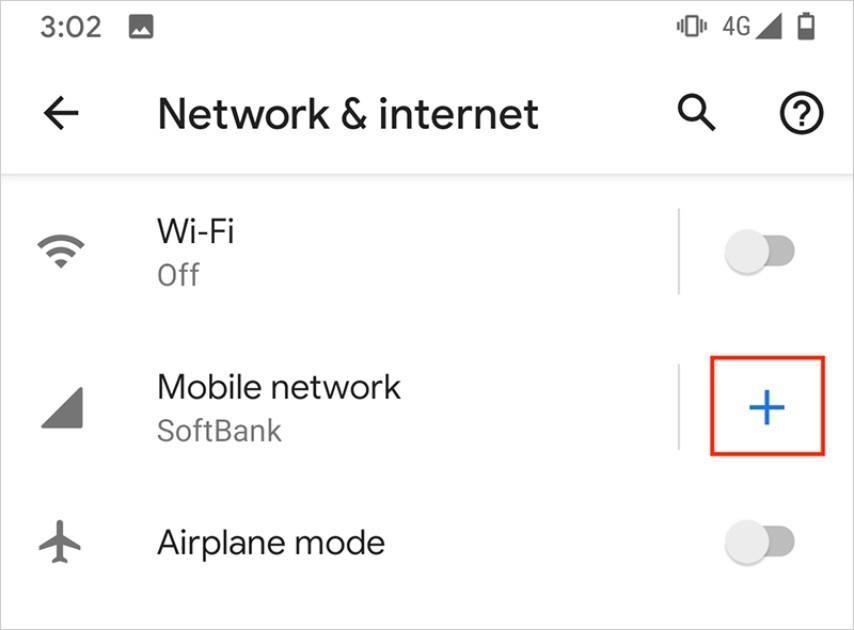
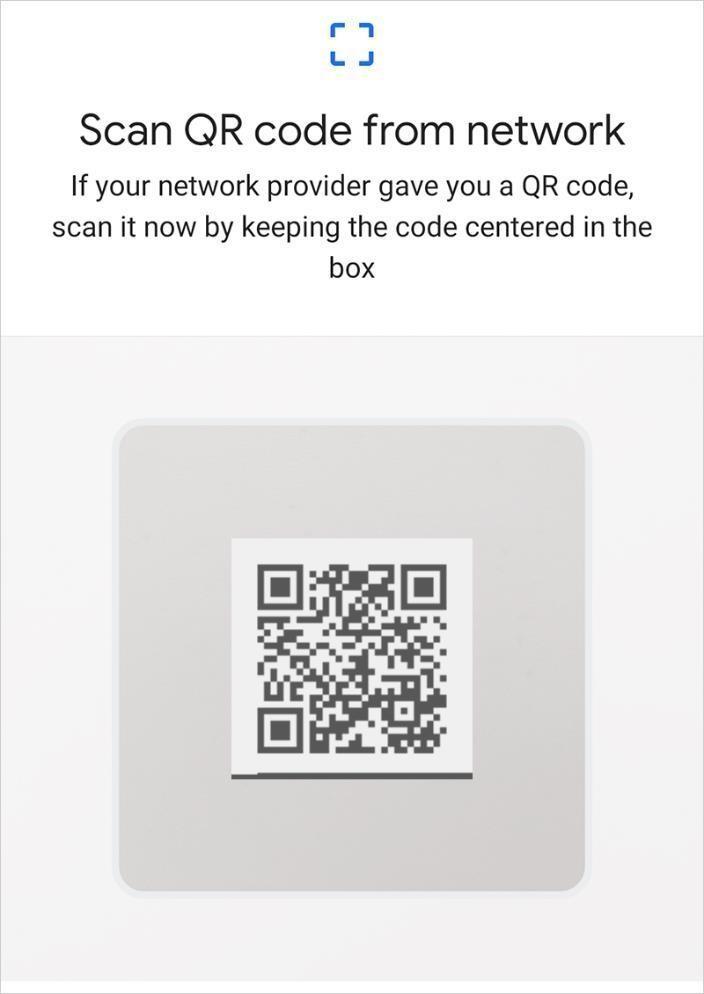
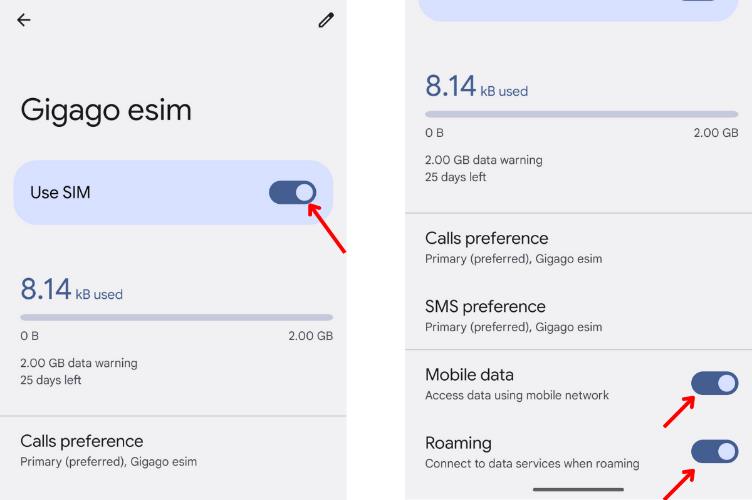
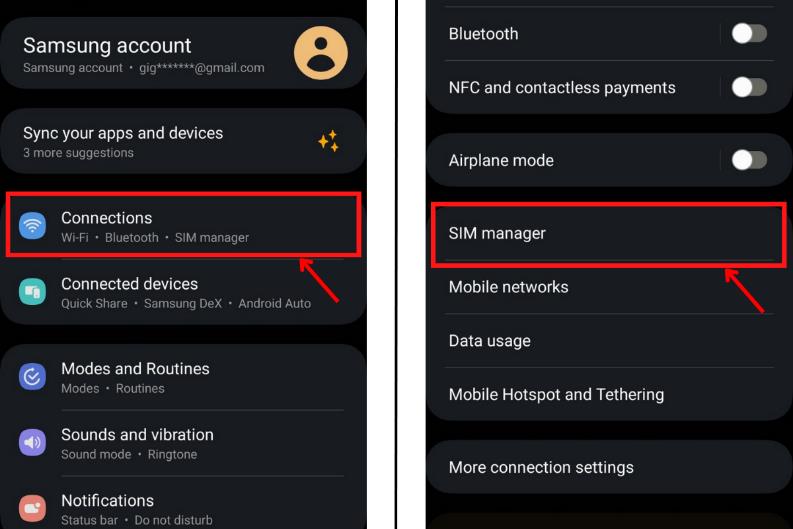
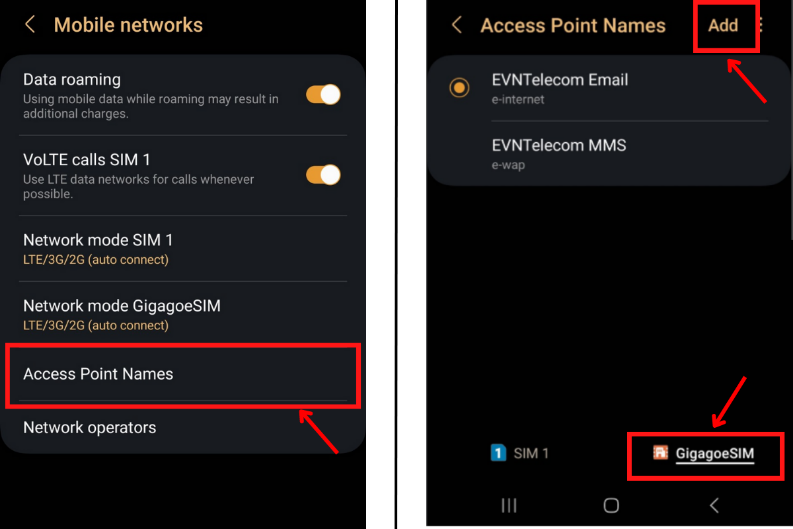
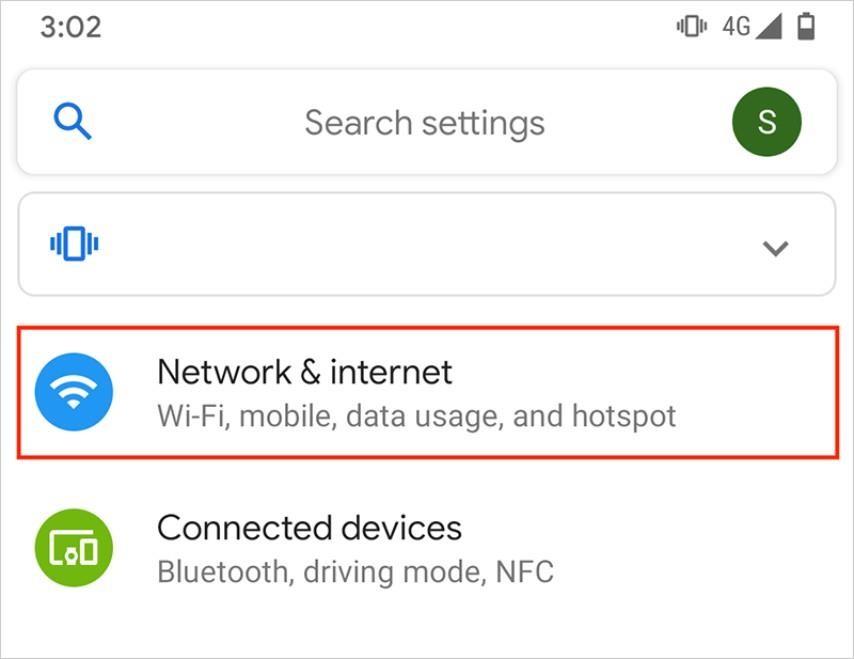
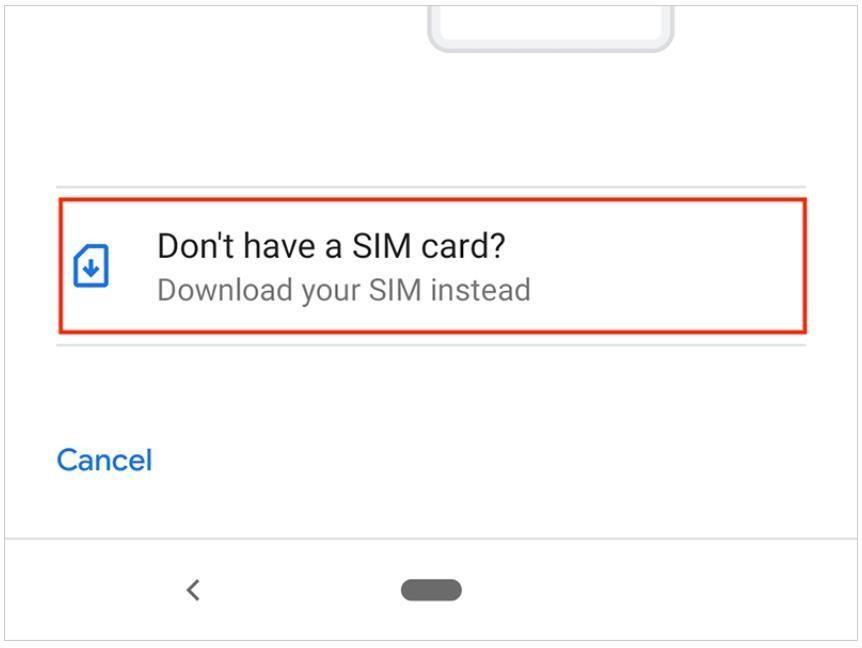
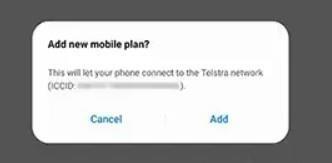
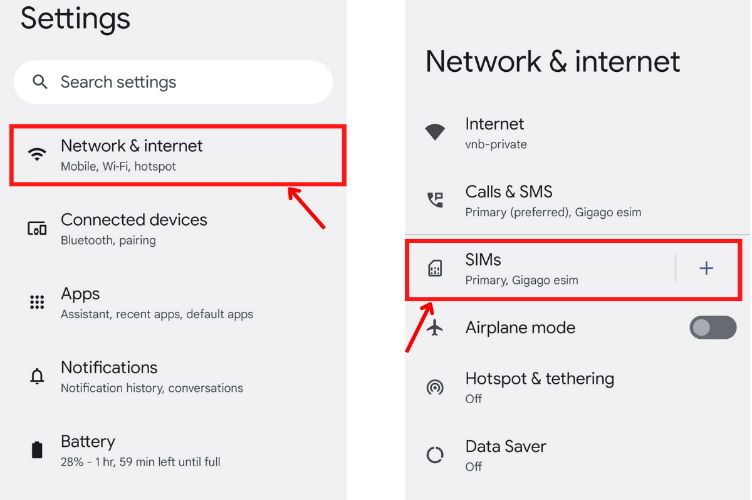
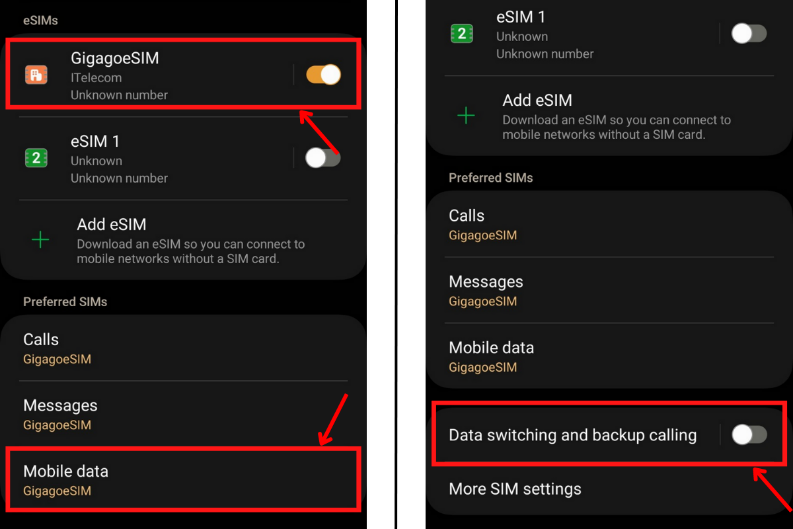
2. Installation Guide for Android Devices
| Samsung Devices | Google Pixel Devices |
|---|---|
Step 1: Install eSIM
|
Step 1: Install eSIM
|
📞 24/7 TECHNICAL SUPPORT:
If you encounter any issues during the installation or activation of your eSIM, please contact our support team immediately for assistance:
- Hotline: 1900 633 437
- Email: cskh@happybooktravel.com
- Zalo OA: HappyBook Travel
- Facebook Fanpage: HappyBook Travel


